Last Updated on June 10, 2020 by Leyla Kazim
Since the purchase of my electric stand mixer, I’ve decided to work through a good proportion of Paul Hollywood’s – How to Bake at a speed of, on average, two bakes a week. This usually consists of a weekend bake, and a bake on a Thursday on which I more often than not work from home. From power-knead to first prove all before the clock strikes 9am.
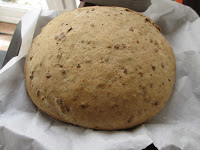
My intention is not to try each recipe (some don’t appeal) but to find a select few loaves that are delicious and have recipes I’ve managed to nail. Today was the turn of the malted loaf. The photograph in the book did it many favours and I quickly came to the conclusion it would go very well with garden tomatoes and artichoke hearts for lunch.
Turns out this recipe has made the list.
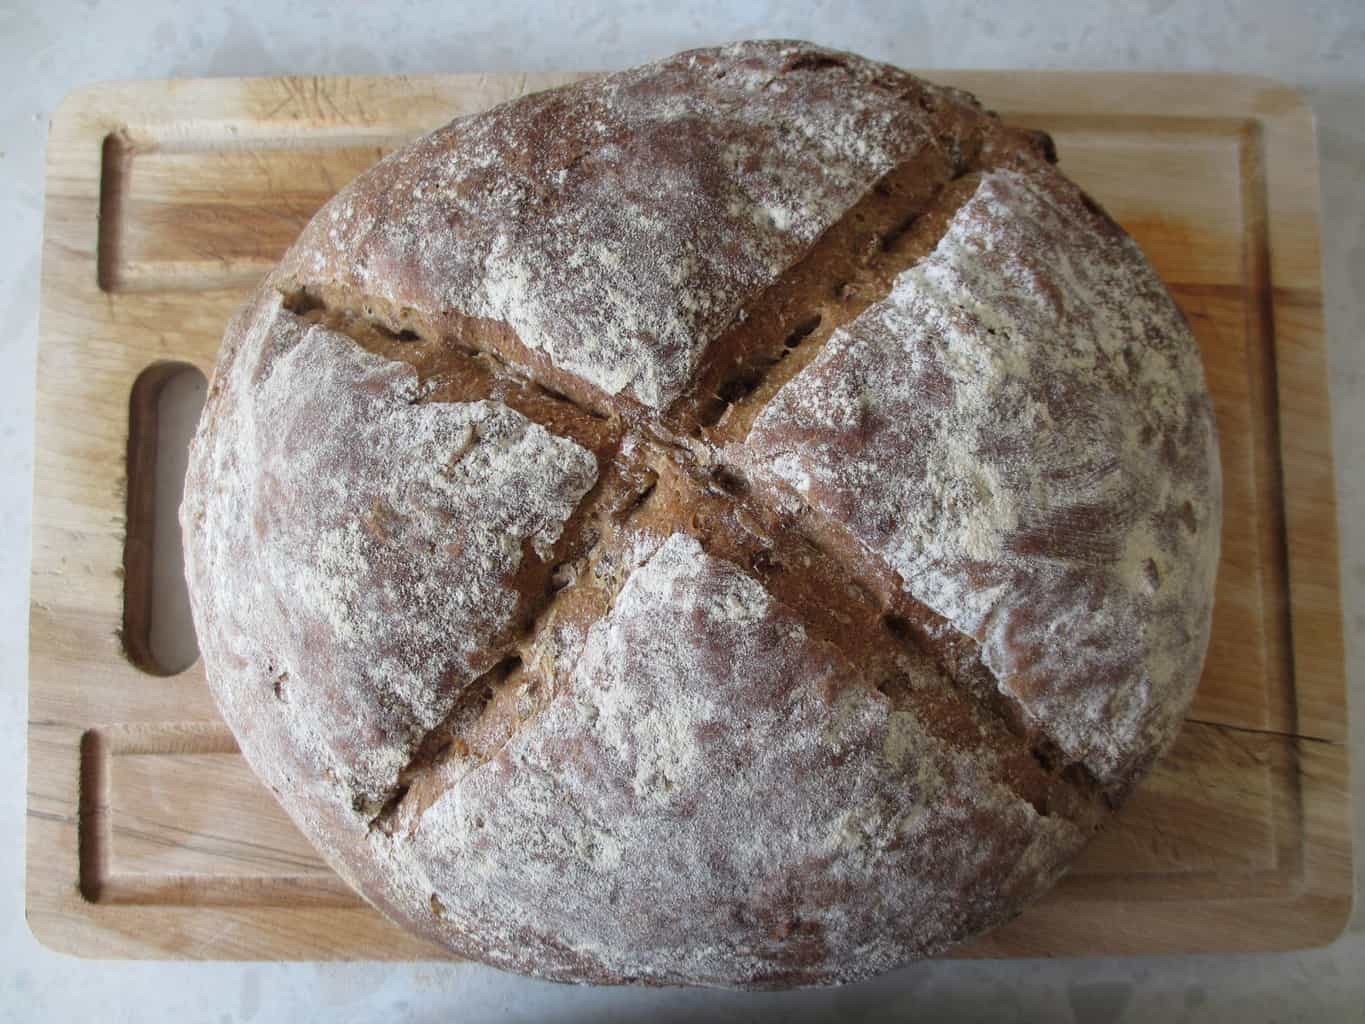
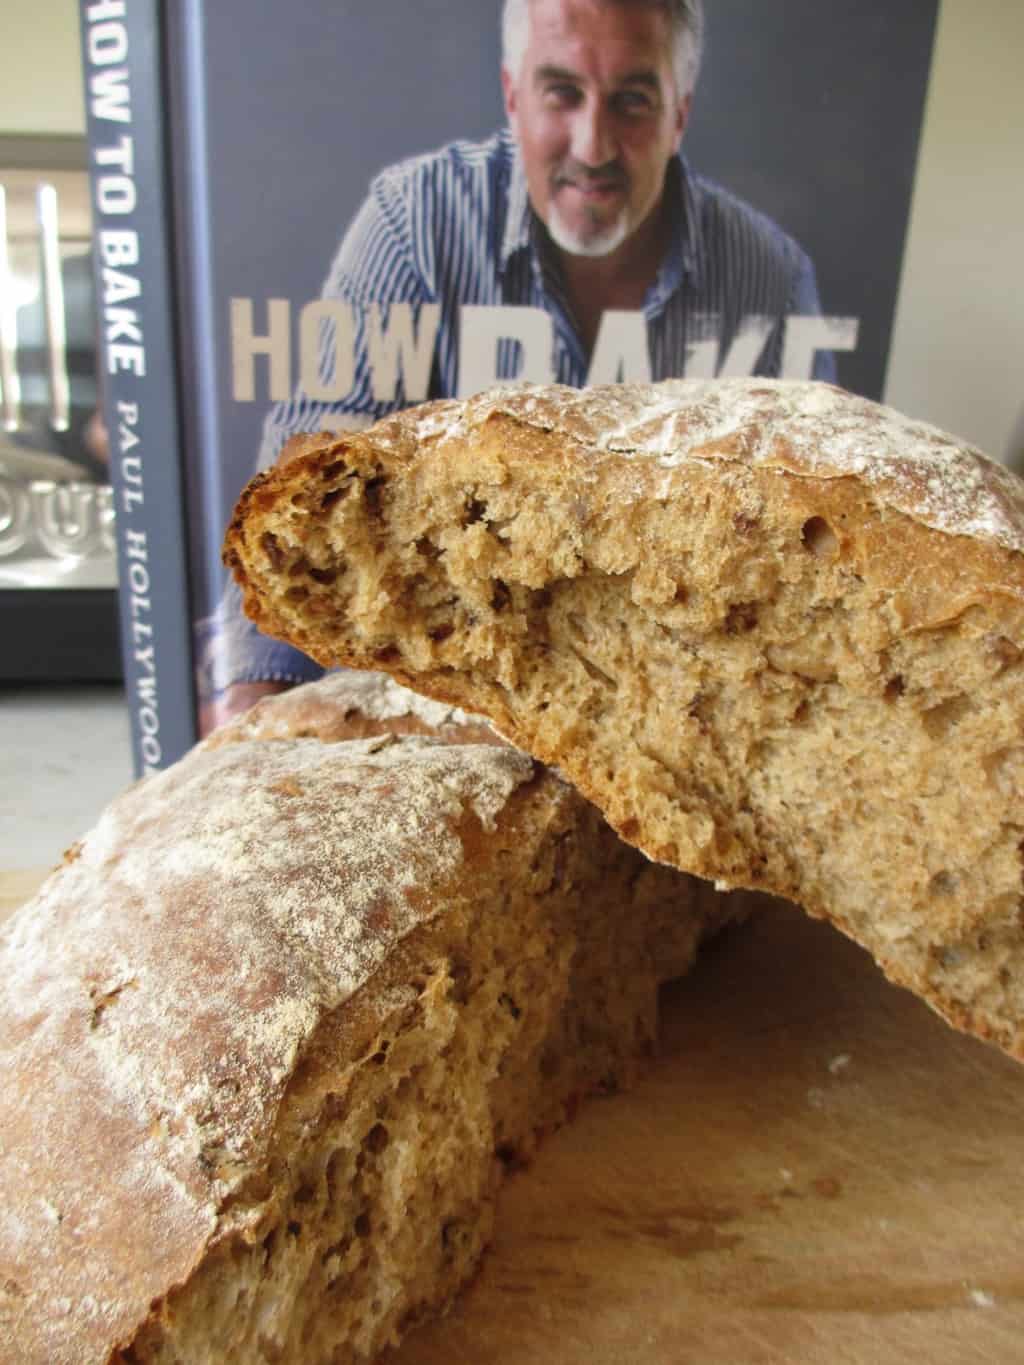
not a bad looking malted loaf, from Paul Hollywood’s How to Bake
Recipe for a malted loaf, from How To Bake by Paul Hollywood
Made with malted flour for great flavour and texture – one to tear rather than slice.
Makes 1 loaf
- 500g malted bread flour
- 10g salt
- 10g instant yeast
- 30g unsalted butter
- Olive oil for kneading
- More of the flour for dusting
Tip | As advised by Paul, I have purchased a small pot of instant yeast, rather than the separate 7g packets available. It means you’re able to measure the amount of yeast exactly as quite often more than 7g is needed for a decent size loaf, and needing to use one and a bit of those little sachets is a pain.
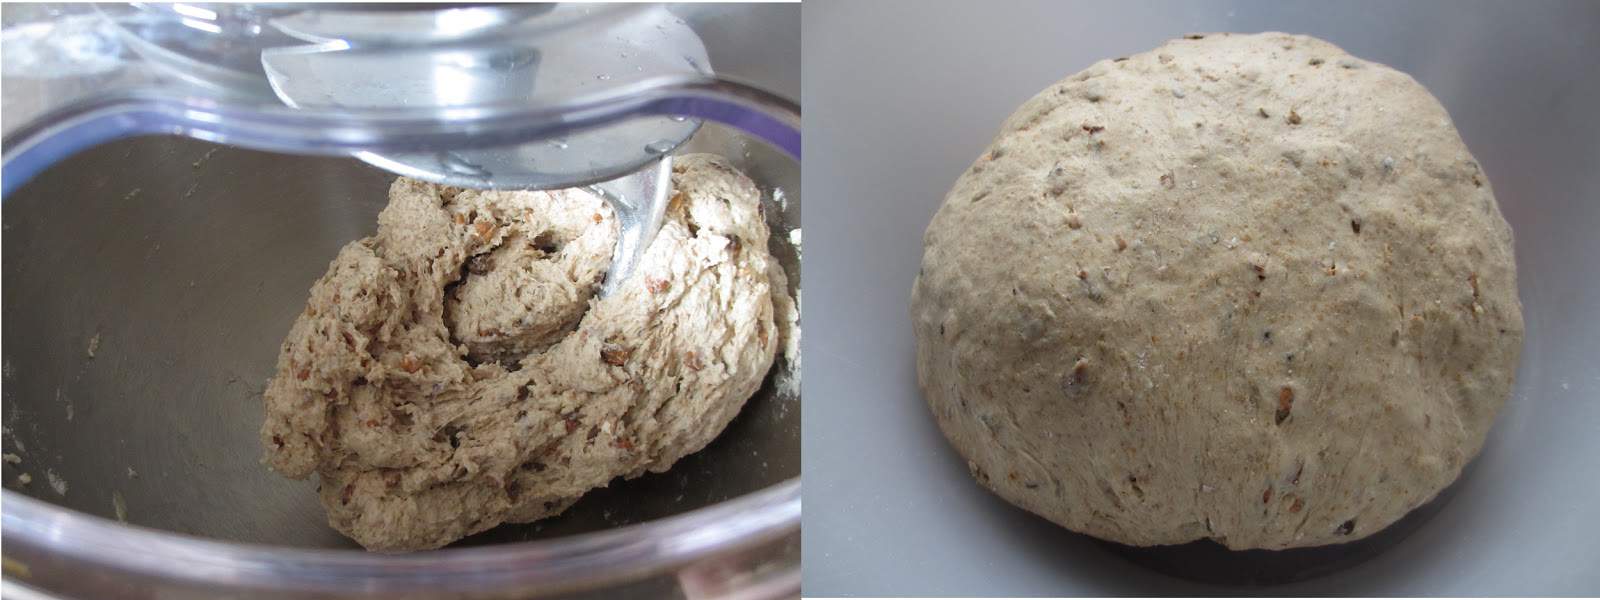
Tip the flour into the mixer bowl – add the salt to one side and the yeast to the other, so they’re not close. Add the softened butter and ¾ of the water and turn the mixer on to 2 (or just mix together with your hands and start kneading on a lightly oiled surface for about 15 minutes).
Tip | I found after a while, the dough ended up wrapping itself around the hook and not touching the sides of the bowl, so it wasn’t being kneaded. This can be the case when making smaller loaves. The way to resolve this situation is to whack the speed on high – with the aid of the laws of physics, the dough will be flung to the sides as it goes round, allowing it to be kneaded once more. You may want to stay near your machine in case it attempts to launch itself onto your kitchen floor.
After a good 10-15 minutes in the machine, tip the dough out onto a lightly floured surface and with floured hands, shape into a cob. Place into an oiled boil, cover with cling film and leave to prove so it has at least doubled in size.
Tip | I find the quickest and most effective way to prove dough is by putting the bowl in a very low oven, about 40C. It will be warmer than any place in your abode and it means the proving time quoted in recipes is almost halved. It took my dough just over an hour to double in size – before and after below.
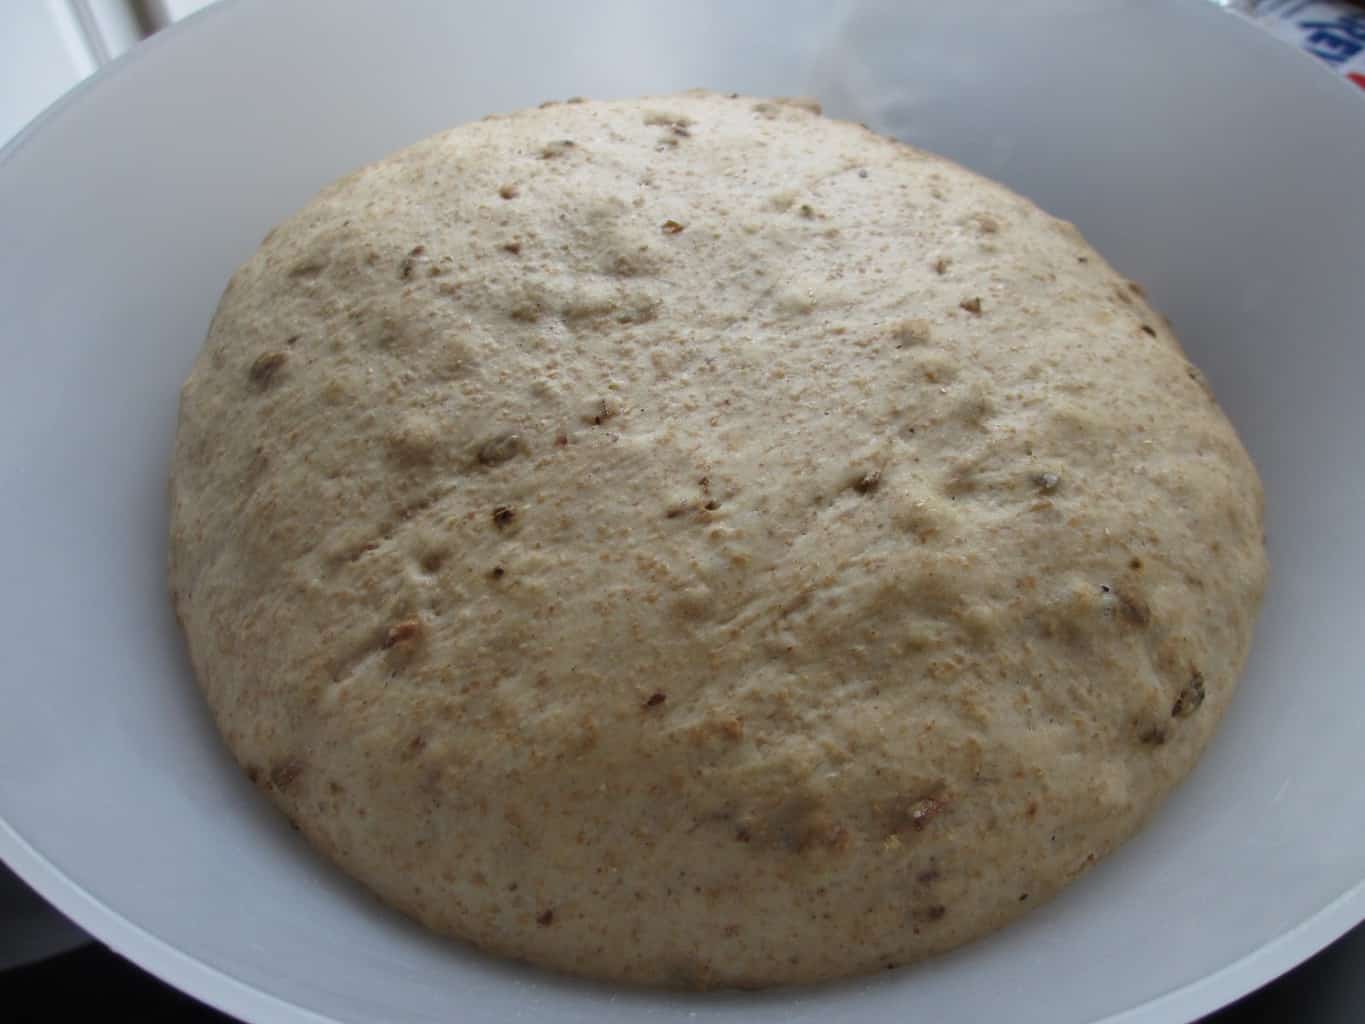
Tip your dough out of the bowl and onto a lightly floured surface. Fold inwards and punch repeatedly so all the air is knocked out – this is called ‘knocking back’. Form the dough back into a round, smooth cob shape, place on the baking tray and cover with cling film (allow some give for it to grow) or place in a clean plastic
bag. Put it back in the oven at the same temperature it was proving before.
This is the second prove and is the final rise before you bake the bread. You can see before and afters of my second prove below.
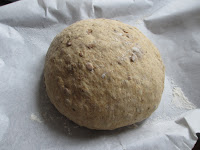
Once it has clearly doubled in size (as above), dust with flour and cut a deep cross into the dough – I tend to use DIY blades as I never find my knives are sharp
enough. That probably says more about the cook than the knives.
Whack the oven up to 220c and bake for around 30 minutes or until the bread sounds hollow when tapped underneath. Place it on a wire rack to cool (at least a bit) before devouring.
It’s not just bread this book covers, but also pastries, sourdoughs, biscuits, puddings, cakes, tarts and pies. It’s actually very informative as along with recipes, it provides the knowledge needed to understand the processes involved with baking.
Paul starts off by talking through a wide range of available flour, how they each behave due to their differing gluten contents, and what type of dough each can be used for. He also talks through the purpose of the necessary additional ingredients such as fat, water, yeast, salt and so on. Photographs are included for all technique descriptions – for example kneading, shaping, knocking back, plaiting and so on.
The book also walks you through how to make some staple pastries, once again with the aid of photographs. Examples include puff pastry, sweet pastry, short crust pastry etc. While most of these are available ready made in supermarkets, I fully appreciate the inclusion of these core recipes and look forward to attempting some puff from scratch.
It’s reassuring to see some classics in the book (crumpets, which I’ve had a go at – not technically baking as they’re done in a pan, buy my goodness I need to purchase some crumpet rings sharpish); teacakes; focaccia; ciabatta; hot cross buns; croissants; Danish pastries – Mr A’s most favoured; scones; baklava; lemon drizzle; Victoria sponge to name but a few).
But there are some more classics I feel are missing – I would like to have seen Paul’s techniques to make the perfect pannetone. I’ve attempted panettone two Christmases in a row and while they’re always delicious and readily devoured, I don’t quite get the texture right. Part cake part bread – quite difficult to master. Apple pie, doughnuts and profiteroles would be some others – I don’t believe there is any reference to choux at all.
Regardless, I feel this is a good staple on the recipe shelf both for those new to the baking game, whilst still providing something for the more tenured bakers out there.
And released just in time for Christmas – handy that.
Related links
RECIPE | Italian ciabatta by Paul Hollywood
RECIPE | Classic crumpets by Paul Hollywood
RECIPE | Easter hot cross buns by Paul Hollywood
RECIPE | Soft bread rolls (barm cakes) by Paul Hollywood
RECIPE | Pear and hazelnut cake by Nigel Slater
RECIPE | Marmalade cake by Jamie Oliver
RECIPE | Beetroot and pecan brownies
RECIPE | Simple and easy chocolate fondants
RECIPE | A step-by-step guide to baking a classic Italian panettone
RECIPE | Roasted red pepper and feta cheese soda bread
RECIPE | Italian almond riciarelli biscuits
RECIPE | Pepparkakor Swedish ginger thins
RECIPE | Gluten-free hazelnut and coffee cookies
RECIPE | Madeira loaf, lemon curd and blueberry trifle pots
RECIPE | Easter chick cupcakes with Stork

I bought a baking mat that can be used for kneading and pastry making without the need for flour , water, oil. Nothing sticks to it. Highly recommended.
Author
Wow that sounds amazing Pat! Is it silicon do you know? They seem to work really well when it comes to things not sticking.
Hi, sorry I don't mean to criticise Mr Hollywood, but as a fellow baker, I would seriously ignore what he says about using olive oil to knead. Olive oil has a very distinct flavour and it is imparted on the bread, this is fine for some breads but he suggests it for almost everything. I would personally suggest a Light dusting of flour, just enough to coat your hands or if you must use oil, use sunflower and only coats your hands and wipe one hand over the surface in question.
Thanks for the tip George. It's always good to hear alternative methods so people can find what suits them best. Many thanks 🙂