Last Updated on June 10, 2020 by Leyla Kazim
When I find myself hankering for a specific item of food, there is little point trying to occupy my mind with much else until the desire has been fulfilled. Great bread fresh out of the oven, lacquered with a knob of melting butter, topped with a quality deep meaty filling and a slick of mustard, and you have have something close to what my daydreams are made of.
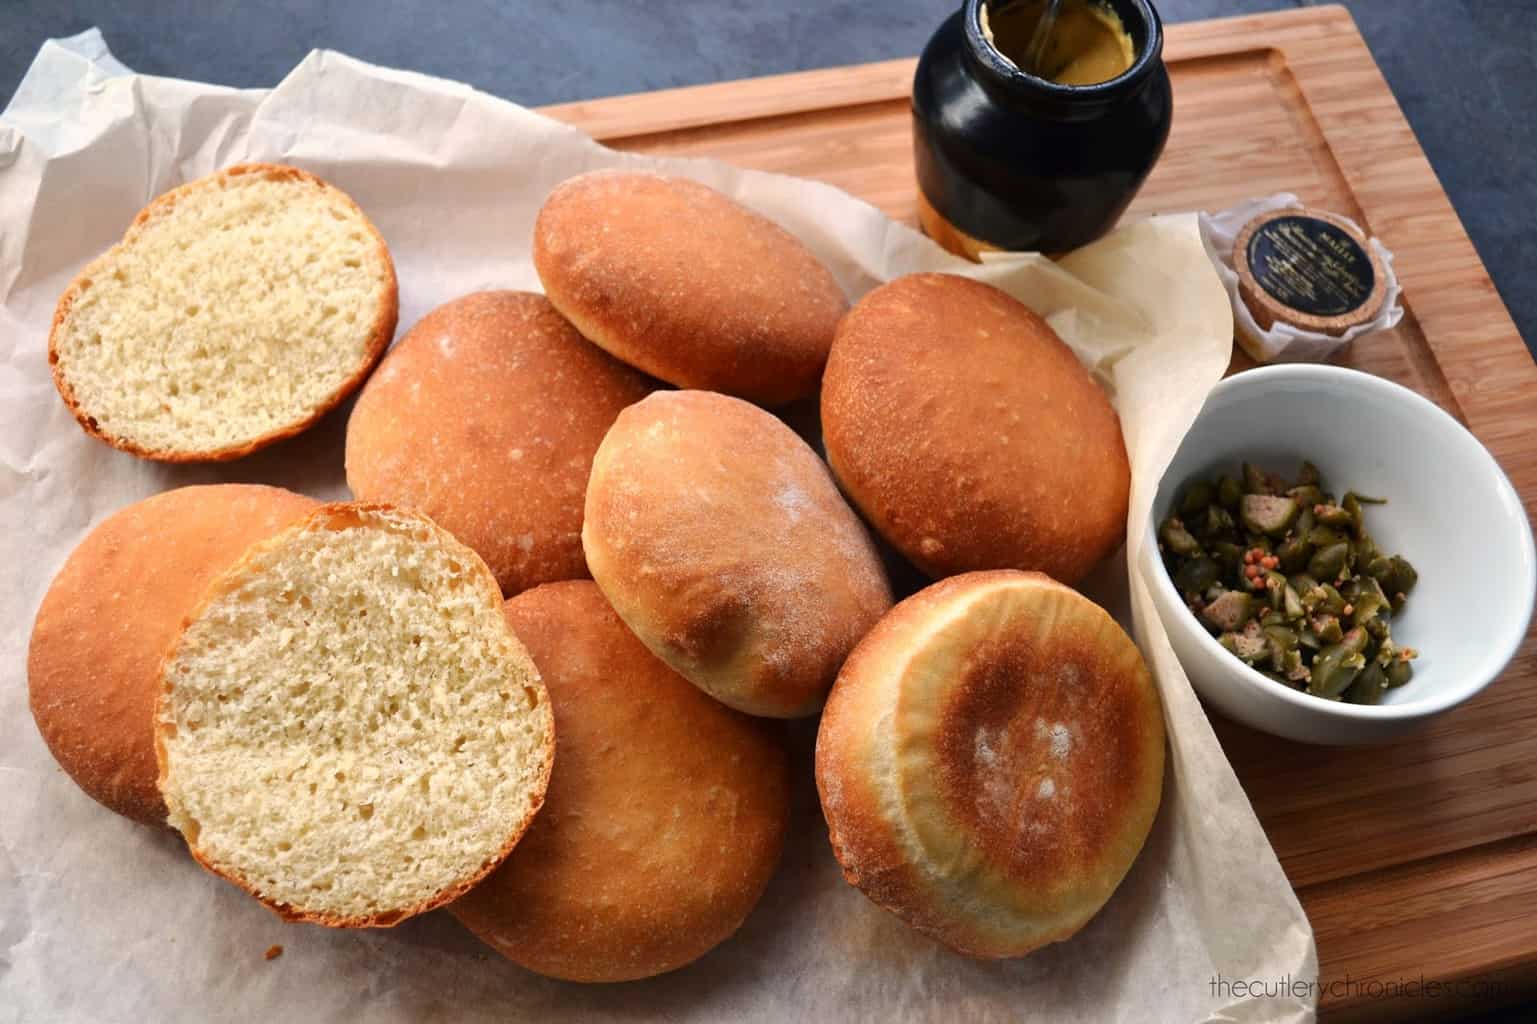
Paul Hollywood has a great recipe for barm cakes (originating from the Northwest) in How to Bake which I’ve used here, the bread more widely recognised as baps, flour rolls, soft rolls, and so on. They’re compact, hold a filling well and provide more bite than usual loaf bread whilst still remaining soft.
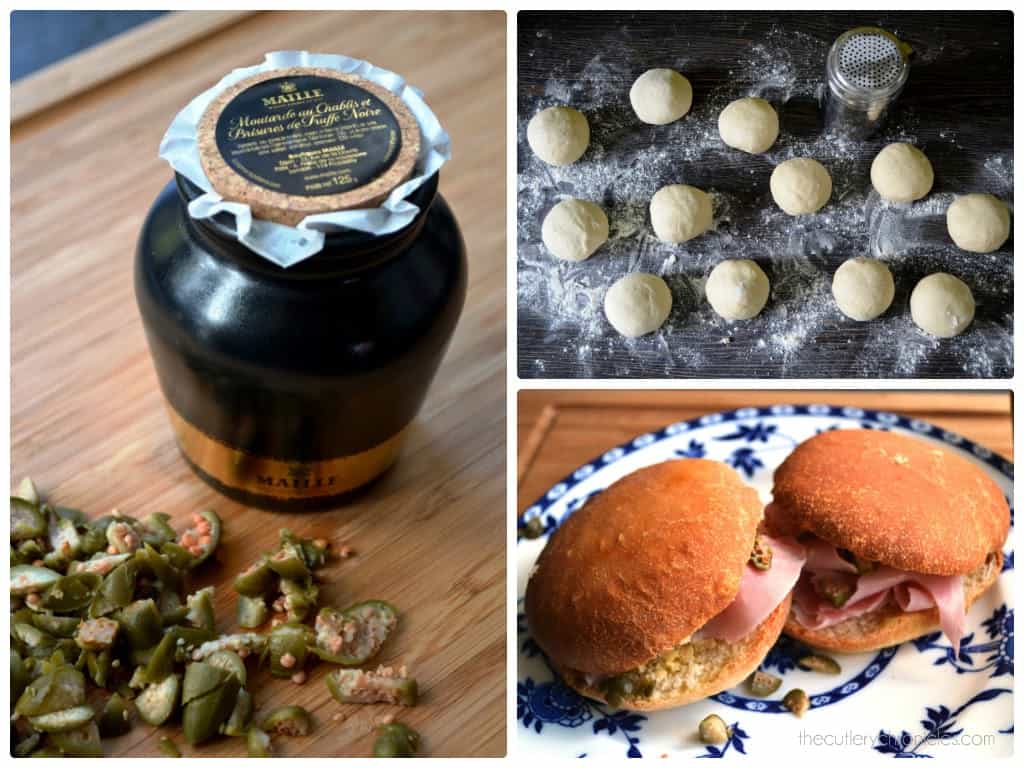
To finish the rolls I’ve stuffed them with quality cured ham, chopped capers and a dollop of indulgence in the form of Maille black truffle and Chablis mustard. Think of a whisp of heat coupled with the unmistakable presence of truffle, creating an unparalleled pairing with the rest of the porky and piquant goodness.
You can find this flavour of the mustard (along with more than 60 new variants) from La Maison Maille Boutique – a beautiful little store situated in the Piccadilly Arcade in the West End, and their first International Boutique which opened this October. This mustard is sold in a stone pot which once empty, you can take back to get refilled.
Soft bread rolls with ham and truffle mustard
Makes 12 – 13 rolls
Rolls
500g strong white bread flour, plus extra for dusting
10g salt
40g caster sugar
10g instant yeast
40g unsalted butter, softened
320ml cold water
Filling
Butter
Good quality ham, ham hock, or other quality meat filling
(enough for as many rolls as you wish to fill)
Capers, chopped
Maille black truffle and Chablis mustard
Put the flour in a large bowl. Add the salt and sugar to one side and the yeast to the other. Add the butter and ¾ of the water, and turn the mixture round with a wooden spoon or your fingers.
Continue to add water a little at a time until you’ve picked up all the flour from the sides of the bowl. You may not need to add all the water, or you may need to add a little more – you want dough that is soft but not soggy. Use the mixture to clean the inside of the bowl, folding the edges into the middle. Keep going until the mixture forms a rough dough.
Tip the dough onto a lightly floured surface. Knead for 10 minutes, working through the initial wet stage until the dough starts to form a soft and smooth skin.
When it feels smooth and silky, put into a lightly oiled large bowl. Cover with cling film and leave to rise in a warm place until at least doubled in size. This could take anywhere from 1-3 hrs, depending on how the warm the environment is where you put it.
Tip I use a very low oven for this (circa 25C) but you could put it into a warm airing cupboard if you have one.
Once the dough has risen, tip it out onto a lightly floured surface. Fold it inwards repeatedly until all the air is knocked out and the dough is smooth.
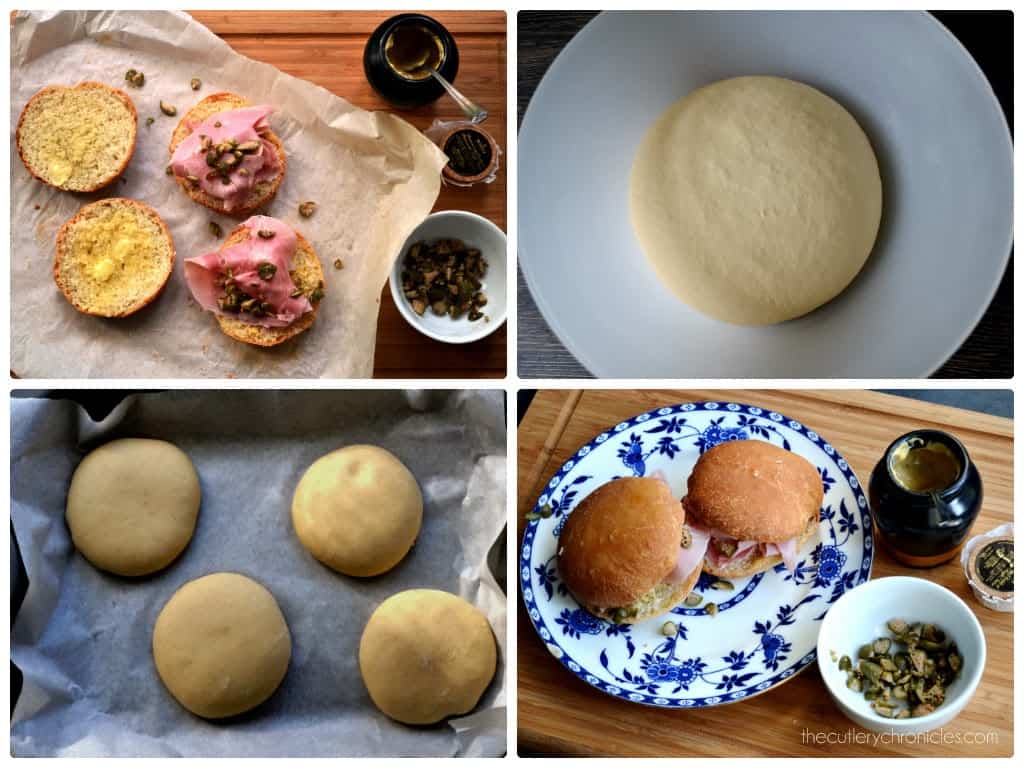
Divide the dough into 12 or 13 pieces weighing around 70g each. Shape each one into a smooth ball by placing a cage formed by your hand and the table and moving your hand around in a circular motion, rotating the ball rapidly. The shape comes with practice!
Put the rolls onto a heavily floured surface and leave to rest for 30 minutes. Cover them with large upturned bowls to prevent them drying out. Meanwhile prepare your baking trays, you will need three. Line them with non-stick baking parchment or silicone paper.
Once rested, roll out the dough balls, using a floured rolling pin, until they are twice the size of the original diameter. Lift onto the prepared baking trays, spacing them apart to allow room for spreading, and sprinkle with flour.
Put each tray inside a large clean plastic bag and leave to prove for about 1hr until the dough has doubled in size and springs back quickly if you prod it lightly with your finger. Meanwhile, heat the oven to 210C.
Tip You can also use cling film to cover the trays but if so, ensure you’ve left no gaps and enough room for the dough to rise without pressing against the plastic too much.
When the rolls are nicely risen, light and airy, bake them for around 10 minutes only until you’ve achieved the same colour as in the photographs. Leave them to cool a little on the baking trays.
Keep the ones you don’t plan to eat straight away in a lidded container once completely cool to keep them soft. For the rest and whilst still warm, cut them in half and allow some butter to melt. Add the mustard, layer the meat and top with some of the chopped capers. What joy.
Afiyet olsun.
