Last Updated on June 10, 2020 by Leyla Kazim
A straightforward Italian ciabatta recipe that’s relatively easy and supremely satisfying to make. It’s by Paul Hollywood from his awesome book ‘How to Bake’. Get that olive oil and balsamic vinegar mix ready for dipping.
The types of bread I particularly like are the ones you can glance at and instantly recognise what they are from appearance alone. That is a baguette. That is focaccia. Those are chapatis.
Last night’s cookbook perusal was in search for such a recipe, and that could be mixed and proving prior to starting work at 9am in my office for the day, my dining room. Paul Hollywood threw one up I hadn’t tried before and that I certainly wouldn’t turn away for lunch – ciabatta.
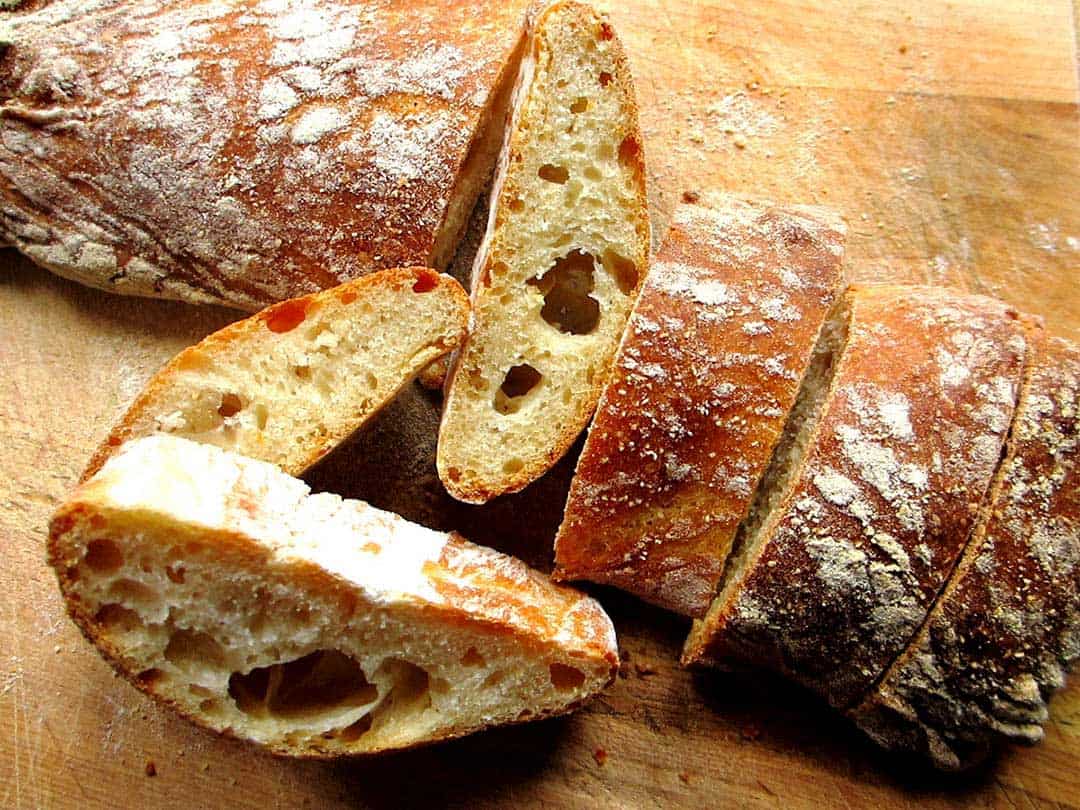
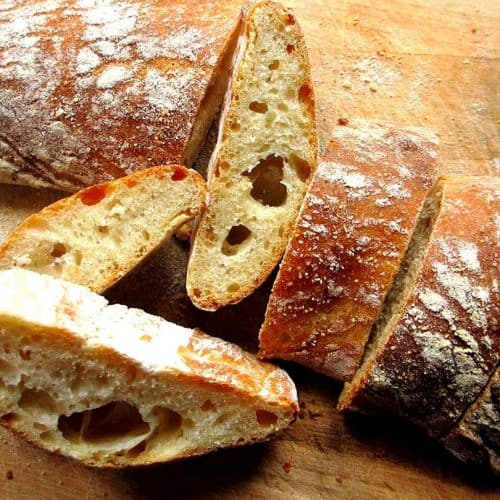
A notoriously wet dough precedes this bread. And for once, Paul heavily advises to use an electric mixer because of this. The extra water in the dough turns to steam during the baking process, creating the signature air pockets and open texture. All of this water makes the mix very sloppy. But boy do you get a result at the end.
Italian ciabatta by Paul Hollywood
Equipment
- Square container
- Baking trays
- Electric mixer
Ingredients
- 500 g strong white bread flour plus extra for dusting
- 10 g fine sea salt
- 10 g instant yeast
- 40 ml olive oil
- 400 ml tepid water
- Fine semolina for dusting optional
Instructions
- Lightly oil a 2-3 litre square plastic container. It’s important to use a square tub here to help shape the dough.
- Tip the flour in the bowl of the mixer and add the salt to one side and the yeast to the other side, so they’re not close. Add the olive oil and ¾ of the water and begin mixing on a slow speed with the dough hook attachment. As the dough starts to come together, slowly add the remaining water. Then mix for a further 5-8 minutes on a medium speed until the dough is smooth and stretchy. See Tip 1 below.
- Tip out the dough into the prepared tub and spread it so it reaches all sides and corners. Cover with a tea towel or reusable plastic wrap and leave somewhere warm until it has doubled or even trebled in size, 1-2 hours or longer. See Tip 2 below.
- Once the dough has doubled or tripled in size, pre-heat your oven to 220C. Line two baking trays with baking parchment or silicone paper. If using baking paper, dust with lots of the strong flour.
- Dust your work surface heavily with more of the flour and add some semolina too, if you have it. Carefully tip out the dough (it’s pretty wet) onto the work surface. There is no need for knocking back, handle the dough gently so you keep as much air in it as possible. Coat the top of the dough with more flour and/or semolina. Cut the dough in half length ways and divide each of those in half length ways also. You should now have four long pieces of dough.
- Stretch each piece a bit length ways and place on the prepared baking trays. See Tip 3 below. Leave the dough to rest uncovered for 10 minutes.
- Bake for 25 minutes or until the loaves are golden brown and sound hollow when tapped. Cool on a wire rack. Do try and eat some whilst still warm though. Not difficult.
Notes
- After the 8 minutes of mixing, the dough is incredibly stretchy and elastic. Take a moment to have a poke – not many doughs look like this.
- I find an oven on its lowest setting (with the light just switched on) creates a nice and warm environment for optimal proving.
- It’s a bit tricky transferring these long pieces of dough onto the trays, because they’re so floppy and sticky. I used two long knives and slid them under each end, trying to lift them like that. That worked for the first couple, but not for the last two. I managed to use one knife and my hand in the end, rolling part of one end onto my hand and lifting the other with the knife. Either way, you’ll get them on the trays in the end.
Nutrition
I’m incredibly pleased with these. I’m pleased with how they’ve turned out – they look exactly as they’re supposed to, with the signature air pockets. They also taste fantastic – a deliciously flavour packed crust with a chewy texture, alongside a light and fragrantly olive middle. I’m also pleased with how they photographed, sliced and ready for my lunch.
In addition to that, this is a bread recipe that only requires a single prove unlike most, resulting in a far shorter time until the end result. This can only be good. Especially when you’re like me and think about your lunch while eating dinner the night before.
Related links
RECIPE | Classic crumpets by Paul Hollywood
RECIPE | Easter hot cross buns by Paul Hollywood
RECIPE | Soft bread rolls (barm cakes) by Paul Hollywood
RECIPE | A step-by-step guide to baking a classic Italian panettone
RECIPE | Roasted red pepper and feta cheese soda bread

A great ciabatta recipe, easy and tastes wonderful.
Thank you!
Author
So glad you enjoyed it Andrew, thank you!
Done this PH recipe several times. Far from the best. Prefer John Kirkwood’s ciabatta recipe.
I tried this recipe for my first attempt at Ciabatta and the result was far better than I dared hope for.
I really enjoyed the making it (especially the super sticky dough) and will definitely use this recipe again. Thank you for sharing it.
Made this yesterday for the first time ever and it was so lovely it got eaten straight away. It’s a bit faffy dividing the sticky dough up to put on baking trays, so I’m remaking again today but I’ve divided the dough straight from mixing into 3 square bowls to prove instead of 1 and I’ll just tip each bowl onto floured baking trays, I hope it works 🤔 wish me luck !!
Author
Sounds like a great method Andi, glad you enjoyed it!
Made this quick ciabatta recipe and was not impressed. I have made the overnight recipe with very nice results. I believe there are no shortcuts when making a good loaf of bread! I also add a generous amount of chopped rosemary and a sprinkling of kosher salt on top before baking. Yum!
Author
Shame you didn’t like Paul’s recipe Juelie! I’ve always had great results with it 🙂
Saw Paul make with Mary. He stressed there was no oil, yet both recipes, one with and one without. So, which is it?
Author
Hi Angel! This recipe is taken directly from Paul’s actual cookbook. It sounds like the recipe he followed on TV was slightly different. Hope that helps!
I made it for the first time yesterday following Paul’s recipe and directions to the letter. Boy, it is a wet dough! I am pleased with the results and the taste is wonderful. My loaves had all the right textures, complete with air pockets. I do think my bread was a tad flat and think that the fault was mine…maybe not proofing enough? I will definitely be making this bread again. Delicious.
Author
This is amazing to hear Patricia! You know, I made focaccia just today (a different sourdough recipe) and had almost forgotten just how WET the dough really is, and I thought it might be a disaster but it turned out great. The wetter the better, the winner of The Great British Bake Off tweeted me! 🤣 There’s no harm in prooving for a little more. Also you might find it easier to proof the whole dough as one mass in a heavily oiled baking tin which is what I did today, then you slice it up after it’s baked 🙂
Brilliant recipe, mine hadn’t risen much so I left the dough in square box to prove overnight in warm oven that was switched off. Reading that the dough would be tricky to handle, I cut and shaped it across 2 sheets of parchment paper rather than a floured board. It was easy to slide the parchment paper onto a baking sheet and the baked ciabatta for breakfast was amazing – Thank you.
Author
Excellent amendments Helen! I’m so glad it worked out for you and you enjoyed the bread. That reminds me, I should bake some more of it soon..!
Did you add any extra moisture to the oven?
I just saw him make this last night on Netflix and he did not add any moisture to the oven. Making these tomorrow. First time so wish me luck.
Well done. Thanks for the effort to post here. I have my first attempt rising now. I first saw this when Paul made it with Mary. Cheers!!!